In this post, I will discuss a little background on what Humidity is and how a DHT11 sensor measures Humidity. After that, I’ll show you how to connect the DHT11 to the Arduino and give you some example code so you can use the DHT11 in your own projects.
THE DHT11 SENSOR:

DHT11 Technical Specifications:
- Humidity Range: 20-90% RH
- Humidity Accuracy: ±5% RH
- Temperature Range: 0-50 °C
- Temperature Accuracy: ±2% °C
- Operating Voltage: 3V to 5.5V
WHAT IS RELATIVE HUMIDITY?
The DHT11 humidity and temperature sensor measures relative humidity (RH) and temperature. Relative humidity is the ratio of water vapor in air vs. the saturation point of water vapor in air. The saturation point of water vapor in air changes with temperature. Cold air can hold less water vapor before it is saturated, and hot air can hold more water vapor before it is saturated. The formula for relative humidity is as follows:
Relative Humidity = (density of water vapor / density of water vapor at saturation) x 100%
Basically, relative humidity is the amount of water in the air compared to the amount of water that air can hold before condensation occurs. It’s expressed as a percentage. For example, at 100% RH condensation (or rain) occurs, and at 0% RH, the air is completely dry.
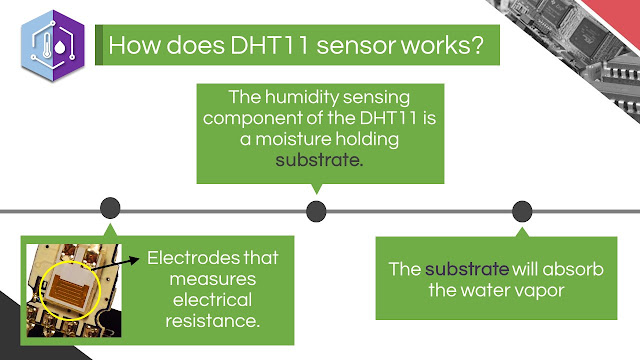
The DHT11 calculates relative humidity by measuring the electrical resistance between two electrodes. The humidity sensing component of the DHT11 is a moisture holding substrate (usually a salt or conductive plastic polymer) with the electrodes applied to the surface. When water vapor is absorbed by the substrate, ions are released by the substrate which increases the conductivity between the electrodes. The change in resistance between the two electrodes is proportional to the relative humidity. Higher relative humidity decreases the resistance between the electrodes while lower relative humidity increases the resistance between the electrodes.
The temperature readings from the DHT11 come from a surface mounted NTC temperature sensor (thermistor) built into the unit. To learn more about thermistors and how to use them on the Arduino, check out our Arduino Thermistor Temperature Sensor Tutorial.
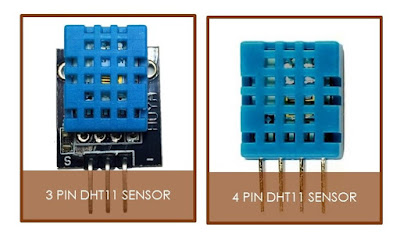
There are two different variations of the DHT11 sensor you might come across. One type has four pins, and the other type is mounted to a small PCB that has three pins. The PCB mounted version with three pins is nice since it includes a surface mounted 10K Ohm pull up resistor for the signal line:
1.Install the DHT Library:
Go to 'SKETCH' >> 'Include Library' >> 'Add Library' >> Select DHTLib.zip file.NOTE: Restart the Arduino IDE in order for you to see the DHTLib in the installed list of library.
2. Upload the sample program below to Arduino and open the serial monitor.
#include <dht.h>

dht DHT;

#define DHT11_PIN 7

void setup(){
  Serial.begin(9600);
}

void loop()
{
  int chk = DHT.read11(DHT11_PIN);
  Serial.print("Temperature = ");
  Serial.println(DHT.temperature);
  Serial.print("Humidity = ");
  Serial.println(DHT.humidity);
  delay(1000);
}
Files needed:
| HumiditySensor.pdf |
| DHTLib.zip |


No comments:
Post a Comment